Wednesday, December 24, 2014

Christmas Cake Pops pt. 2

 photo thenewbakingmemoirs_zps410cbd72.jpg
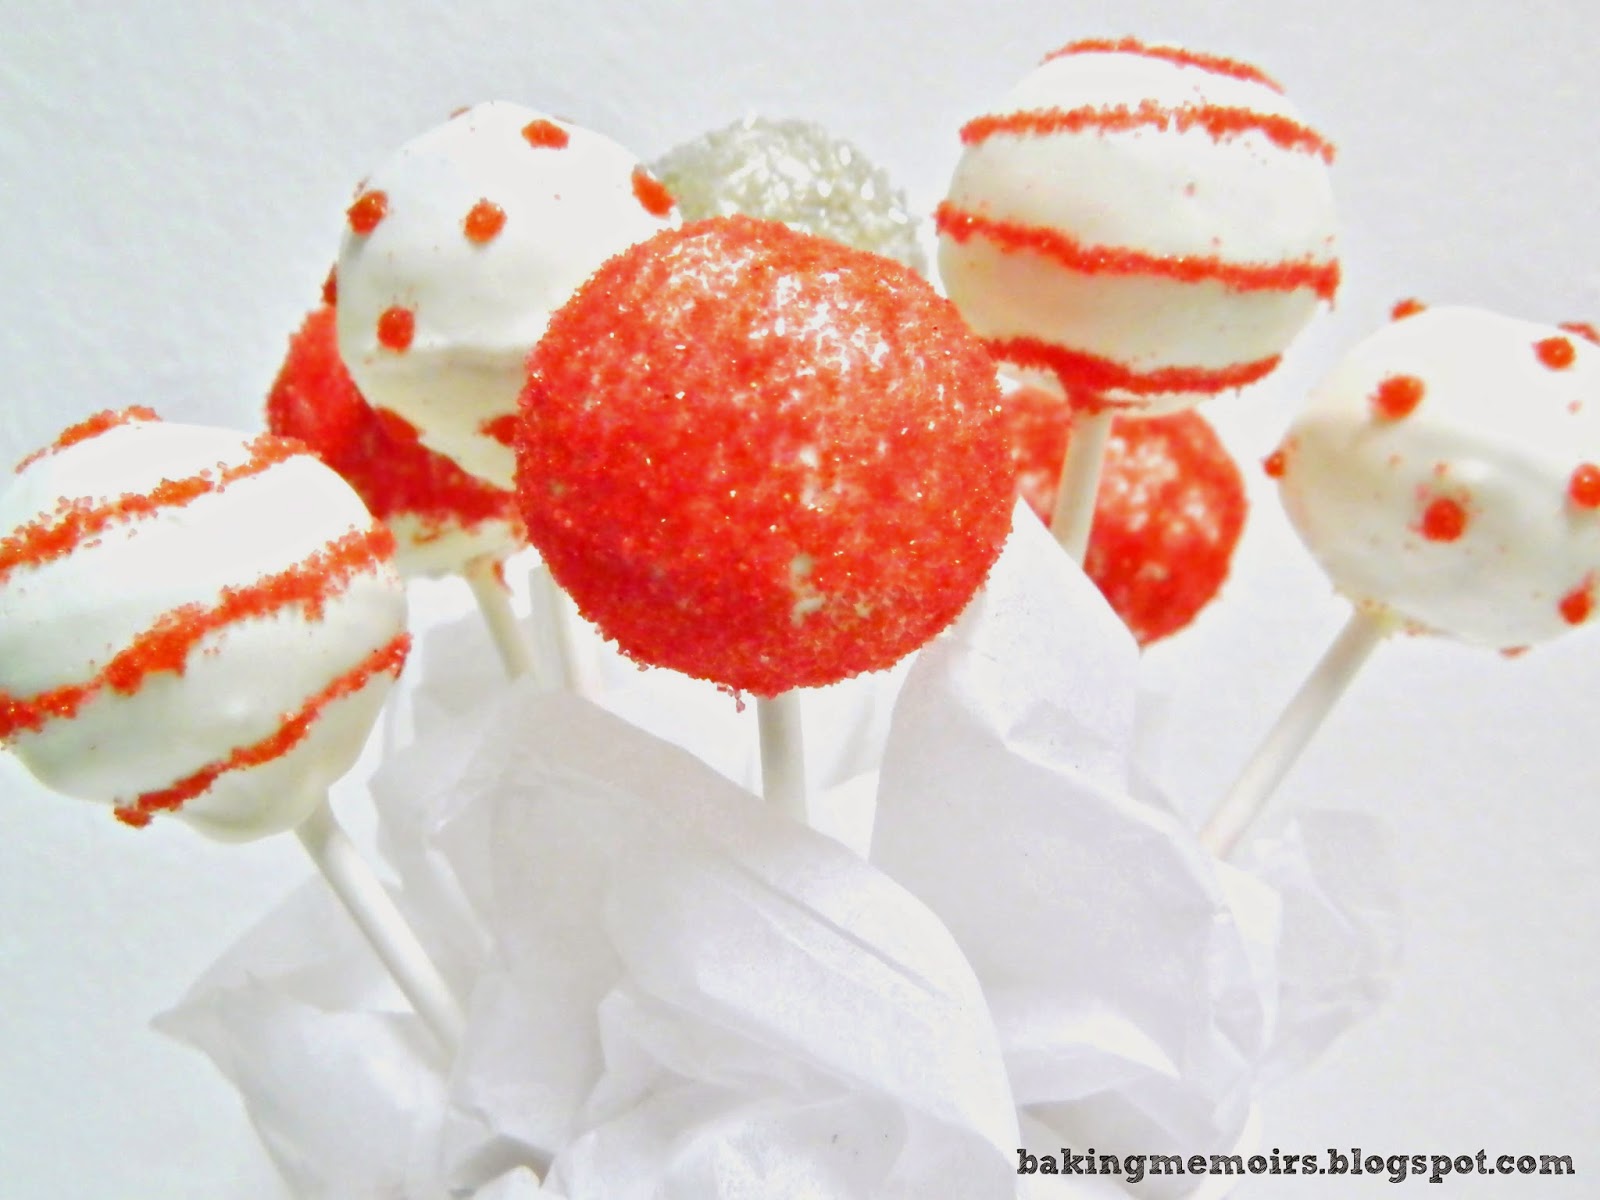
 Still need more ideas on how to decorate cake pops for Christmas even after part 1? Here are a few more designs I came up with in my Christmas cake pop frenzy. And for a simple way to dress them up as a gift, just buy some red plastic cups, add a foam belt and glitter puff paint for the buckle. Insert a piece of Styrofoam into the cup, add tissue paper and arrange your pops by sticking them into the foam. I added a handmade gift tag to finish up the look. I love the way these turned out and I'm so excited to deliver them to a few of our family and friends!

 Penguins with little flower sprinkles for their happy feet were a must for me.
 How about some polar bears? You can even keep it simple and use black pearl sprinkles for the eyes and candy eyeballs for the snout and nose. Make it even more fun by adding lots of fur.
 Or any bears...okay I guess panda bears don't really have anything to do with Christmas...but I LOVE PANDAS! They are so cute and I had to make at least one.
If you have the same impulse with any other animal or cake pop character, make it anyways and then just add a Santa hat. Don't Santa hats make everything relate to Christmas?
For something a little more simple and extra delicious add some peppermint extract to your candy melt coating and then sprinkle with crushed candy canes. These were so tasty, that while doing a taste test I accidentally ate five!
 
 Of course just covering the whole thing in sprinkles works too. Or use paint a design with corn syrup before dipping it in the sprinkles.

I hope you can find some inspiration from these Christmas cake pops. And if anyone is a cake pop making expert I'd love any tips or advice as well.

 photo thenewbakingmemoirs_zps410cbd72.jpg

Monday, December 22, 2014

Christmas Cake Pops pt.1

 photo thenewbakingmemoirs_zps410cbd72.jpg
 With Christmas just around the corner and my new found love of cake pops I thought it would be fun to make a bunch to give as gifts to some of our family and friends. I've made a variety so I'll share them all in two separate posts. I want to make a variety pack of cake pops and cookies that will be just as cute as they are tasty.
Along with your viewing pleasure, please enjoy this little jingle written by yours truly to commemorate my new found cake pop making love...to the tune of The Christmas Song aka Chestnuts Roasting since we are in the holiday mood of course.
♪Cake pops sitting on my kitchen counter.
Melted chocolate on the stove.
Tiny dots, for their eyes and his nose,
will make these cake pops so divine♪
   
♪Everybody knows that I like making real cute food
But they've not seen these cake pops yet
With all this cuteness, how they'll react I don't know
But I hope these pops will fill them with delight♪
 ♪Oooh look here's Santa on his way
He has no beard or mouth but just look at that face!
And all my facebook friends are going to try
to convince me to make them a few cake pops for tonight.♪
♪And so, I'll find a way to get more supplies
to bake another fifty or ninety-two
I've got more pops to make, but there is time and many ways
I love making cake pops, Christmas cake pops, making cake pops for you! ♪
These cake pops are so fun to make!
Be sure to stay tuned for more Christmas cake pop ideas and a cute and simple packaging tutorial.
What other designs could I make for Christmas?

 photo thenewbakingmemoirs_zps410cbd72.jpg

Wednesday, December 17, 2014

{Paper Flower Series} Coffee Filter Roses Tutorial

 photo thenewbakingmemoirs_zps410cbd72.jpg
 Our next flower tutorial in our Paper Flower Series is actually my favorite from the wedding. They are just so delicate and actually look the most realistic of all the flowers we made. 
There are several steps to making these flowers. I did a lot of research to get them to look the most realistic as possible and tried numerous other methods before coming up with this one. You could probably find simpler ways to do this on the internet but the extra steps in this method make a HUGE difference in the end result. 

Supplies Needed:
 -coffee filters (the ones that look like giant cupcake liners); 
5 filters per flower
-acrylic paint in your desired color 
-a bowl or bucket of water for dyeing
-glue gun and glue sticks
-floral wire
-floral tap

Dyeing Coffee Filters:
Step one to making these flowers is dyeing the coffee filters to your desired color. 
To do this:
 -water down some acrylic paint in a bucket or bowl of water.  
-take a stack of coffee filters and turn them inside out so that they no longer stick together
-in stacks of about 5 filters each completely submerge the filters in the paint and water
-wring out the dyed filters and lay them out to finish drying, turning filters after a while to speed up the drying process
*dye as many as possible if you are making a lot of flowers so you can let them all dry at once

Prepare Dyed & Dried Filters:
Before I get into the details of cutting the petals and assembling the flowers you will need to fold the coffee filters.
a) Get 5 dyed and dried coffee filters to make a flower.
b) Fold 1 coffee filter in half 3 times and set aside.
c) Take 2 coffee filters and while stacked on one another, fold in half 3 times then set aside.
d) Take the 2 remaining coffee filters and while stacked on one another, fold in half once and then in thirds. Now set aside.  

Assembling the bud of the Flower:
1-Cut coffee filter from step b above and cut according to picture.
2-Take piece shown below and pinch points of arrows together.
3-Take a piece of floral wire that's about 7" long and bend about an inch of wire down onto itself to keep pinched points together.
4) Open up petals.
5) Pull petals up away from the wire and for a bud.
6) Here's another angle of what this should look like.

Adding Small Petals:
7-Take piece shown in picture and cut along the folds or dotted lines.
 8-You should end up with 4 heart looking pieces.
9-Lay hearts on one another as shown in picture and make 2 small folds to secure. 
Add hot glue where dotted line is shown in the picture.
10-Glue heart petals to bud.

Adding Medium Sized Petals:
1-Take filters from step c in "Prepare Dyed & Dried Filters" above and cut out a petal.
The general shape you want is pictured but the top of the petals shape can very. 
Look at some real flowers for inspiration. 
I made some that were more pointed, some wavy, have fun with it. 
You should end up with 16 separate medium sized petals after this step. 
2-Take two petals and twist them together at their tips. 
Do this with all 16 medium petals and end up with 8 pairs.
3-Using scissors, curl petal tips the same way you would curl ribbon. 
This will give the petals a more realistic look. 
Then add a dot of hot glue where arrow is pointing.
4-Glue petal pairs together as pictured.
5-You will have 4 bunches of 4 petals.
6-Use hot glue to add these petals around your growing bud.
 
Adding Large Petals & Completing Flower:
1-Take remaining filters from step c in "Prepare Dyed & Dried Filters" above and cut out a petal the same way you did for your medium sized petals. You should end up with 12 large petals.
2-Twist the tips of 4 single petals. Twist the remaining 8 petals in pairs as shown in the picture. 
3-Curl all the petals.
4-Add glue to single petal as pictured in step 2 and glue a petal pair on top of it.
You will end up with 4 petal trios.
5-Add these petal trios to your blooming bud.
6-Here's another angle of what it should look like.
7-Clean up and secure those little "tails" with some floral tape.
8-Now using a chopstick, pencil, or skewer open up your flower. Done!

Dye filters in various shades of the same color for a really pretty bouquet. You could also put a stamen instead of a bud in the flowers center. See my tutorial on Tissue Paper Bubble Flowers for instructions on preparing the stamen. 
I really love these flowers. They are just so pretty. You could make them year round in all kinds of colors, throw them in a vase and just admire their gorgeousness. Plus, since they are made our of thin coffee filters, light shines beautifully through them. I am really considering making and using coffee filter flowers for a back-lit backdrop. 


 photo thenewbakingmemoirs_zps410cbd72.jpg

Tuesday, December 16, 2014

{Paper Flower Series} Tissue Paper Bubble Flower Tutorial

 photo thenewbakingmemoirs_zps410cbd72.jpg
 As many of you know last month I was very busy with a paper flower wedding. I have received many requests for tutorials on all of the different flowers used to make the centerpieces. Here is tutorial number 1. These tissue paper bubble flowers are super elegant but simple to make if you are willing to take the time. Because of the materials used these flowers are very budget friendly. These were a favorite of many but I ended up using them as a filler flower because I just couldn't figure out a way to arrange a bunch of them nicely. 

Supplies for each flower:
-glue gun and glue sticks
-floral wire
-floral tape
-1" foam ball
-5 pieces of tissue paper (dimensions about 3 1/2" x 2 1/4")
-a pearl or bead for embellishment
*I've also included an option for a stamen center instead of the pearls/beads

How to with pictures:
Follow steps 1-6 for all flower types:

1-wrap and twist tissue paper around the foam ball.
 Doesn't it look like a faceless little girl with pigtails? or an eyeball? or an alien head? 
After twisting so many we started seeing all kinds of things!
2-pop out the ball and repeat for each sheet of tissue paper
3-glue one "pigtail" to the back of its own "head"
4-repeat with all 
5-bend remaining "pigtail" back and away from the opening, 
this will be the center of the flower.
6-glue together bubble petals near their centers as shown.

Decide on if you'd like a pearl/bead center or stamen center. Follow the steps in Option A for pearls or beads. Follow the steps in Option B for stamen.

How to Option A:
7-finish gluing the last of your petals together at the center
8-twist wire around the bunch of "pigtails" on the bottom of the flower
9-use floral tape to make it even more secure.
10-glue a pearl or bead to the center of the flower to finish.

How to Option B:
7-fold a piece of tissue paper (2" x 2 1/2") in half, 
cut some fringe on one side, attach some floral wire by poking the 
wire through about an inch and bending it onto itself
8-twist and wrap the tissue paper around the wire and then wrap with some floral tape
9-glue stamen to center of the three petal bunch
10-glue two petal bunch to stamen and other petals
11-secure "pigtails" down with more floral tape
12-admire your completed flower!

Stay tuned for more paper flower tutorials!
 photo thenewbakingmemoirs_zps410cbd72.jpg

Monday, December 15, 2014

Paper Flower Wedding


 photo thenewbakingmemoirs_zps410cbd72.jpg
My brother in law got married at the end of last month. His fiance was gracious enough to ask me to be in charge of all of the decorations. We had a super limited budget and our venue was a gym so we decided to make one of my dreams come true and turn it into a paper flower wedding!

It was a lot of work but we were able to make hundreds and hundreds of flowers for under $100! We also made many memories as we gathered weekly to have our flower making parties.
I of course forgot my camera, but that's because I also made the cupcakes and decorated their Zippy's dobash cake that morning!
Here are a few pictures from the wedding (good thing phones have cameras!):

We made so many different kinds of flowers it's almost crazy! We made giant paper flowers for the head table backdrop, fondant flowers for the cake and cupcakes, tissue paper bubble flowers, coffee filter flowers, and paper roses and hydrangeas for the centerpieces. The fact that every single flower was handmade by friends and family brought a special spirit to the entire reception. It was so worth it and I would do it again in a heartbeat!
I have been posting some of the flowers on my Instagram and have had a few requests for tutorials. I'll be doing my best to get those tutorials up. 
As a side note, if you are considering doing a paper flower wedding be sure to take note that it is a LOT of work. If you can gather a lot of help and have ample time it is doable and so worth it though. With a group of about 7 meeting for several hours weekly and working on flowers on my own every day we were able to pull off about 75 centerpieces and the backdrop in about a month. I would have preferred having a few more weeks to make a few more flowers for more centerpieces but that's just me.

Tips and Side notes:
~Paper flower centerpieces can still be arranged using floral foam
~You don't have to wait to start making your arrangements because the flowers won't wilt and die, but if they do get smashed just refluff!
~Consider where you will be storing all of your flowers because depending how many you make they take up quite a bit of room. 

 photo thenewbakingmemoirs_zps410cbd72.jpg

Cupcake Cake Pops

 photo thenewbakingmemoirs_zps410cbd72.jpg
Cake pops, cake pops, cake pops. If I'm being completely honest, every time I'd think about all the cute cake pops I'd see pop up on the internet, the thought of trying to make them myself intimidated me. I have a cake-pop/doughnut hole maker so making the pops itself would be simple enough, but the whole dipping and decorating part completely scared me so I stayed away. 

But more and more I'd see such cute creations and I decided there must be a way to do it without having the cake balls fall off the sticks or getting the chocolate to coat and dry smoothly. Thankfully I came across a great post by Homemaker Chic and it had all the answers I was looking for. Check it out, her tips made all the difference for me.


A few days ago I got a text from a friend asking if I could help her out by making some cupcakes or cake pops for her sons birthday less then a week away. I took this as a sign that I should face my fears and attempt to make some cute cake pops worthy of any birthday boy. 

The only requirements were that they'd be blue and chocolate. Dots and swirls on a cake pop would be simple, but I really wanted to push myself. So, I thought why not include everything she asked for in one! So here they are, chocolate cake balls covered in chocolate, made to look like cupcakes with blue frosting and sprinkles.

To make these I used brown and blue chocolate melts, some sprinkles, and modeling chocolate for the cherries. Prep your cake balls and chocolate melts as suggested by Homemaker Chic and your ready to decorate as follows.

Step by step pictorial:

1) Dip in chocolate and allow to dry.
2) Dip the top third in candy melts in your choice of frosting color and allow to dry as well.
3) Re dip top third in frosting and SLOWLY swirl as you lift it out.
4) Quickly add some sprinkles before it can dry.
5) Top with a modeling chocolate ball or pearl for the cherry on the top before the chocolate dries as well.
6) Step back and admire your cute little cake pop cupcake!

 Me thinks I like to make cake pops now and will be looking for excuses to make many more! I foresee some Christmas cake pops to gift in my near future.

 photo thenewbakingmemoirs_zps410cbd72.jpg

Monday, September 22, 2014

Owl Cake for Baby Ame

 photo thenewbakingmemoirs_zps410cbd72.jpg

My husband's sister, husband, and kids have been in town for a wedding. It also happens to be their daughter, baby Ame's 1st birthday coming up so the family had a little get together to visit and celebrate. I made a bunch of cupcakes for everyone else but Ame got her own cake. It is a 6 inch round covered with my special guava frosting and a simple fondant owl. At the end of the evening we bust out the cake. Very smart so we wouldn't have to fight off all the other little kids.
 She was happy to be able to grab her food all by herself.
When the cameras came out she kept giving us this look like "why are you taking pictures?" She is a very serious and aggressive little girl when it comes to food. Haha! When she isn't wanting food or eating she is the sweetest little happy snuggler so it was quite entertaining to see her get crazy when it it is meal times. However, she likes to share her food as long as she feels she is getting her own quickly enough.
Lucky for big brother because she was willing to share her cake frosting with him. They were in love with that frosting!
In fact they loved the frosting so much that they licked the cake clean and didn't even bother with the cake. Loved getting to spend some time with these two cuties!
 photo thenewbakingmemoirs_zps410cbd72.jpg
Related Posts Plugin for WordPress, Blogger...